Industry News
Curation by industry experts
Hot Articles
Popular Tags
How to assess seam quality in 250ml aluminum beverage cans
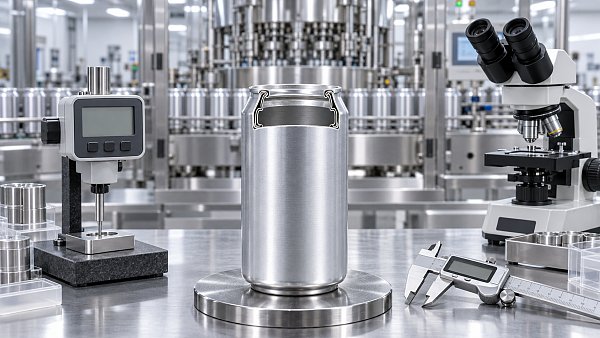
A sound double seam is the closure that keeps a filled can sealed through handling, pasteurization or retort exposure where applicable, distribution, and storage. In 250ml aluminum beverage cans, the seam is small, but it is not a cosmetic feature: a minor loss of overlap, a damaged cover hook, or a fold at the wrong point can create a leak path that only becomes apparent after the product has left the packing line.
Seam assessment should therefore combine three checks: external appearance, dimensional measurement, and seam teardown. A can may look acceptable while having insufficient internal engagement between the can body and end. Conversely, a single visible wrinkle does not automatically mean the container will leak; its location, depth, continuity, and relationship to seam tightness determine whether it is a safety concern. The aim is not to inspect every feature in isolation, but to confirm that the seam was formed consistently and can withstand its intended use.
Start with the seam specification, not a generic target
There is no universal “good” seam dimension for every 250ml aluminum beverage can. End diameter, can geometry, metal gauge, end design, seaming chuck profile, compound application, product pressure, and line speed all influence the approved operating range. A dimensional value that is satisfactory for one end system may be unsuitable for another.
Use the current container and end supplier specifications, together with the filler’s validated seam standard, as the inspection reference. The specification should state the approved limits and action thresholds for the measurements used on that line. It should also define how samples are taken, how many points around each seam are measured, and what response is required when a reading approaches or exceeds a limit.
A frequent mistake is comparing a measured seam only with a historical average. A stable average can hide a localized defect caused by a worn roll, a misaligned lifter, or an inconsistent end feed. The better question is whether the seam is within its approved range at multiple positions around the can and whether the trend remains stable over time.
Inspect the finished seam before cutting it apart
Visual inspection is the fastest way to identify conditions that need immediate attention. Examine clean, empty or filled samples under consistent lighting, rotating the can so the full circumference is visible. Look at the seam from the side, then inspect the underside and the transition between the body wall and the end.
Normal seams should be continuous, even, and free from obvious damage. The seam should not show sharp, broken-looking edges, loose metal, severe scoring, or localized distortion. A light contact mark from handling may be superficial; a mark that changes the seam profile is more significant because it may have altered the seal.
Visual checks are especially useful after a line start-up, product changeover, stoppage, jam, can tip-over, or adjustment to the seamer. These events can affect a limited sequence of cans before routine sampling detects a drift. Any can that contacts a guide rail, accumulates a dent near the flange, or enters the seamer incorrectly should be treated as potentially compromised rather than returned to the normal flow.
The dimensions that reveal whether the seam was formed correctly
Dimensional inspection turns a visual judgment into a controlled decision. The measurements commonly used for beverage-can seams include seam thickness, seam height or length, countersink depth, body hook, cover hook, and overlap. The exact terminology can vary between equipment suppliers, but the principle remains the same: the folded body metal and cover metal must be interlocked with sufficient, consistent engagement.
Seam thickness and seam height
Seam thickness indicates how tightly the layers of metal have been compressed. An unusually thin seam may point to excessive seaming pressure, which can damage metal, squeeze out sealing compound, or create cutting. An unusually thick seam can indicate insufficient compression, loose formation, or a fold that has not been fully drawn into place.
Seam height helps show whether the first and second operations are forming the closure consistently. Changes in height can result from roll wear, incorrect roll profiles, end variation, or lifter pressure issues. Height alone is not proof of seal integrity, but a sudden shift is a useful process signal and should be read alongside thickness and teardown findings.
Body hook, cover hook, and overlap
The body hook is the portion of the can body that has been folded into the seam. The cover hook is the corresponding folded portion of the can end. Their engagement creates overlap, which is central to seam integrity. Too little overlap increases the risk that the body and end are not sufficiently locked together. Excessive or irregular hook formation can also be a concern, particularly if it causes crowding, wrinkles, or incomplete compression.
Overlap should be evaluated from actual measured hook lengths and seam geometry using the calculation method defined in the approved seam procedure. Avoid relying only on a calculated result when the cut section clearly shows distorted metal, fractured coating, or poor hook condition. Calculations assume meaningful measurements; they do not correct a poor sample cut or explain a visibly defective seam.
Countersink and profile consistency
Countersink depth and profile help confirm that the end is seated consistently during seaming. A change may be linked to end damage, poor chuck engagement, incorrect lifter settings, or variation in the can flange. This is particularly relevant for compact beverage formats, where small mechanical deviations can become more noticeable in the finished seam profile.
Measure at several clock positions around the same can. A seam that is acceptable on one side but out of range on the opposite side often points to eccentricity, uneven roll loading, damaged tooling, or a problem with can presentation. Averaging the readings without preserving their positions can conceal that pattern.
Teardown inspection is where seam quality is confirmed
Cutting and opening the seam provides the most useful evidence of internal seam formation. Cross-sectioning tools, seam saws, microscopes, seam scopes, or validated vision systems can be used depending on the plant’s control method. The tool must produce a clean section. A rough cut can bend the hooks, smear the compound, or create false indications of metal damage.
After sectioning, inspect the metal layers and compound distribution. The body hook and cover hook should be properly engaged throughout the seam. Look for gaps, incomplete fold formation, internal fractures, excessive wrinkling, broken coating, displaced compound, or signs that the metal has been cut rather than smoothly formed.
Seam tightness is often assessed during teardown by examining the cover hook after the seam is carefully peeled or stripped. The goal is to judge whether the cover hook was properly compressed and supported, not simply whether the seam is difficult to pull apart. The appearance of the internal surface, the degree of wrinkling, and the continuity of the contact area matter more than force alone. A destructive test performed inconsistently is difficult to compare from shift to shift, so the inspection method needs controlled tools, training, and sample preparation.
Sealing compound deserves close attention. The compound helps fill small irregularities between metal surfaces; it does not compensate for a poor mechanical seam. A seam can contain compound and still be unsafe if hook engagement is inadequate. Similarly, compound squeeze-out should not be judged in isolation. It may arise from high compression, an end issue, or normal variation depending on the approved end system. Its significance comes from the wider seam condition.
Separate process monitoring from release decisions
A seam program works best when it distinguishes between a trend that requires adjustment and a defect that requires containment. Routine measurements can detect gradual movement before production enters an unacceptable range. A repeated false seam, a visible cut, a severe vee, or an out-of-limit teardown result is different: it requires an immediate assessment of potentially affected cans.
For each nonconformance, record the time, filler or seamer station, can and end lot, product condition, measured values, defect description, and the corrective action taken. These records make it possible to identify whether the issue is tied to one station, one equipment event, a particular end supply, or a handling problem upstream of the seamer.
When a seam issue is found, the investigation should begin with the last known acceptable check and include output produced since that point. Simply adjusting the machine and passing the next sample does not establish that the intervening cans were acceptable. The hold-and-release decision should be based on the severity of the defect, the duration of possible exposure, inspection evidence, and the product’s distribution status.
Common causes that are easy to overlook
Seam defects are often blamed on the final seaming operation, but the cause may begin earlier. A damaged can flange can prevent correct hook formation even when the rolls are correctly adjusted. Misfed ends, end dents, contamination on the rim, inadequate lubrication where required by the process, and poor can transfer can all create seam variation.
- Tool wear: Rolls, chucks, lifters, and bearings change the forming geometry as they wear. Repeated defects at a fixed clock position are a strong reason to inspect the relevant tooling.
- Incorrect change parts: Components that look similar may not match the can and end combination in use. Verify part identification after maintenance and format changes.
- Line interruptions: A jam or restart can disturb can presentation, end feed, or seamer timing. Targeted sampling after recovery is more useful than waiting for the next routine interval.
- Measurement variation: Different operators, damaged gauges, inconsistent cut locations, and poor sample handling can create apparent process changes that do not exist.
- Ignoring package conditions: Carbonated products, thermal treatment, and rough distribution do not create a bad seam, but they can expose a marginal one sooner.
The operational response should match the defect. Adjusting second-operation pressure may address a compression issue, but it will not correct a dented flange caused by a transfer rail. Replacing a worn roll may help an uneven seam, while a recurring defect linked to one end lot may require inspection of incoming ends and end handling. Treating every defect as a simple adjustment risks increasing damage elsewhere in the seam.
Build a practical inspection sequence
A reliable program is usually simple enough to execute consistently under production conditions. It should be integrated with start-up approval, routine in-process checks, event-based checks, and documented corrective action.
- Confirm the correct can, end, tooling, and approved seam specification are in use.
- Inspect representative finished cans visually around the full circumference.
- Measure the required external seam dimensions at defined positions.
- Perform a clean teardown on selected samples and assess hooks, overlap, internal defects, and compound condition.
- Compare results with the approved limits and with recent process trends.
- Escalate immediately when a critical defect or out-of-limit condition is found; identify and isolate potentially affected production before making machine changes.
- After corrective action, verify the adjustment with new samples and document the result.
Automated seam inspection can strengthen this process where line speed, volume, or traceability needs justify it. It is most useful when it is matched to a clear response plan. Vision or measurement data without defined limits, verification routines, and ownership can produce a large volume of information without improving release decisions. Manual teardown remains valuable because it can reveal internal conditions that an external image may not fully characterize.
For sourcing and packaging reviews, the most useful questions are whether the can-end system has a documented seam specification, whether the filling operation can demonstrate repeatable inspection, how nonconforming output is contained, and whether seam records can be traced to production conditions. Those controls matter more than a generic statement that the cans are “leak tested” or “quality checked.” A seam is dependable when its design, tooling, measurement method, and response process all work together.
Recommended News
 Carton & PlasticsHow to assess seam quality in 250ml aluminum beverage cansLearn how to assess seam quality in 250ml aluminum beverage cans with practical visual checks, precise measurements, teardown methods, and defect-control guidance.Packaging Supply ExpertSep 28, 2026
 Carton & PlasticsWhat drives breakage rates in bulk wine bottles wholesale orders?Bulk wine bottles wholesale buyers: discover what drives breakage rates, from glass quality and packaging to pallet loading, and reduce costly claims.Packaging Supply ExpertSep 27, 2026
 Office FurnitureHow supplier scorecards reduce risk in furniture procurementFurniture procurement supplier management becomes more resilient with supplier scorecards that track quality, delivery, compliance, and corrective actions. Learn how to reduce sourcing risk.Interior Sourcing LeadSep 26, 2026
 Office Paper & Printing PaperHow roll diameter affects downtime when using jumbo paper rollsJumbo paper rolls can cut changeovers and downtime—if your unwinder, handling, and tension control can support them. Find the optimal roll diameter for smoother output.Packaging Supply ExpertSep 25, 2026